
Cash Receipts Support Document
Open as: PDF or Word Document
1. Post Transactions
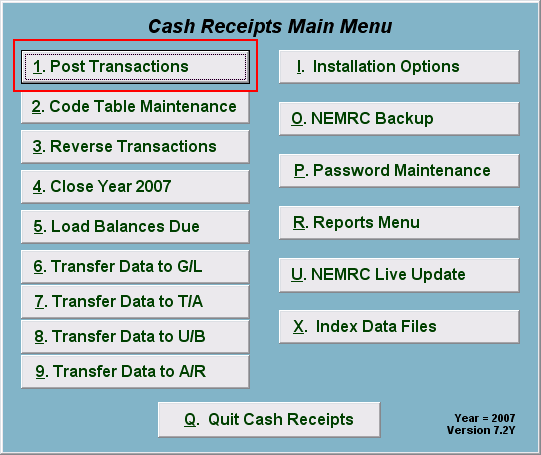
Click on "1. Post Transactions" from the Main Menu and the following window will appear:
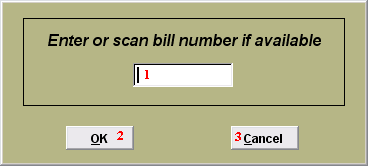
- Enter the Bill number here or scan with the bar code reader if available.
- OK: Click "OK" to move on to the next screen.
- Cancel: Click "Cancel" to cancel and return to the previous screen.
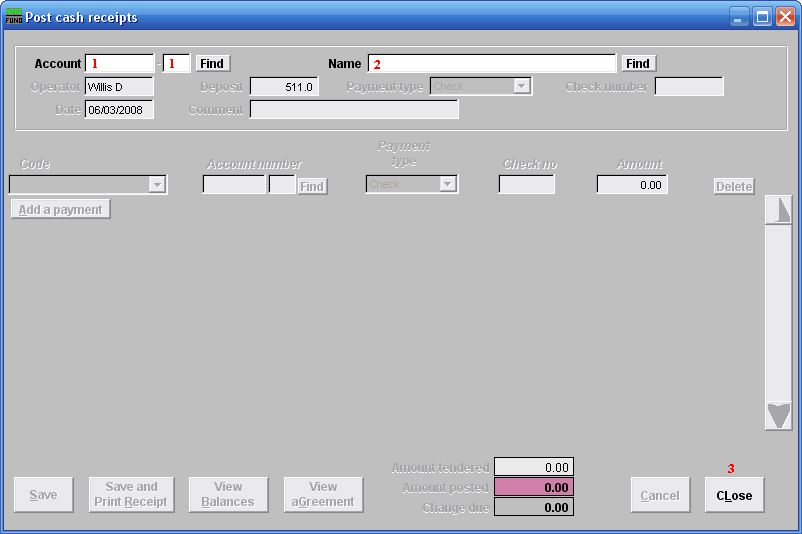
Post Transactions
- Account: This field appears when the Installation option is set to use account numbers. Type in the Account number OR click "Find" to select from the Customer Lookup. The Name field 2 will automatically be filled in after selecting the Account number. Enter a new account number, and hit Enter; you will be offered to create a new Account with this account number.
- Name: Type in the Name OR click "Find" and select from the Customer Lookup. The Account field 1 will automatically be filled in after selecting the Name.
- CLose: Click "CLose" to return to the previous screen without saving.
Post
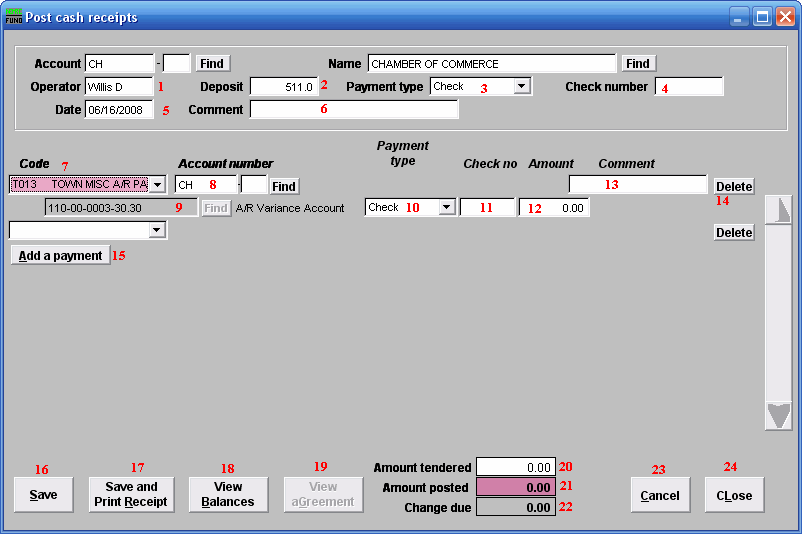
- Operator: This defaults to the name on the login station.
- Deposit: This field is open based on the Installation option that allows changing it on the posting screen. Enter the amount of payment.
- Payment type: Select the Payment type from the drop down menu.
- Check number: Enter the check number.
- Date: Enter the Date payment is being made.
- Comment: Enter any Comments necessary here.
- Code: Enter the Code OR select by clicking on the drop down arrow.
- Account number: Enter the Account number or select by clicking "Find" and select from there.
- General Ledger Account: This field is only available if the option in "I- Installation" is set to allow changing of General Ledger accounts during posting.
- Payment Type: Select the Payment Type from the drop down menu. This should default from the value selected in field Payment Type. This allows recording of multiple payment types on a single receipt.
- Check number: Enter the Check number. This should default from the number entered in field 4 Check number. This allows recording of multiple check numbers on a single receipt.
- Amount: Enter the Amount of the payment.
- Comment: This field is open based on the Installation option that allows comment recording per item on the posting screen.
- Delete: Click "Delete" if this line item needs to be deleted.
- Add a payment: Click here if there are multiple payments to be recorded.
- Save: Click this button to save on this computer. Refer to GENERAL FILE for more information.
- Save and Print Receipt: Click this button to save on this computer and to Print a Receipt.
- View Balances: Click this button to View any Balances still owed.
- View aGreement: Click this button to View any Agreements.
- Amount tendered: This field is automatically filled in when in field 12 Amount is entered. You can change this amount if different.
- Amount posted: This field is automatically filled in and cannot be changed.
- Change due: This field is automatically filled in and cannot be changed.
- Cancel: Click "Cancel" to cancel and return to the previous screen.v
- cLose: Click this button to cLose the screen without saving and return to the previous screen.
Delete
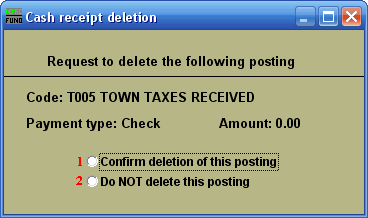
- Confirm deletion of this posting: Click the circle if you are sure you want to delete a posting.
- Do NOT delete this posting: Click the circle if you want to cancel the process of deleting and return to the previous screen.
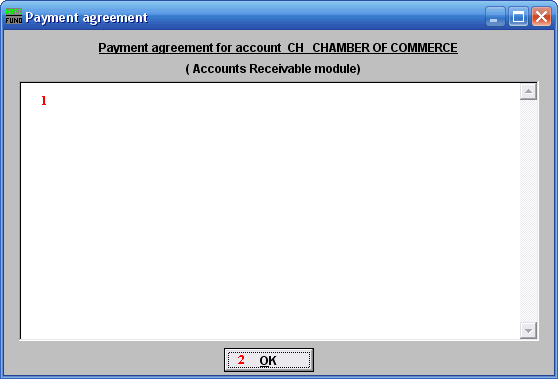
- This is a User defined field. This displays the agreement that was entered in the module defined in the window heading.
- OK: Click "OK" to save changes and return to the previous screen.
