
Land Records Support Document
Open as: PDF or Word Document
R. Reports Menu: D. Detailed Land Records Report
Table of Contents
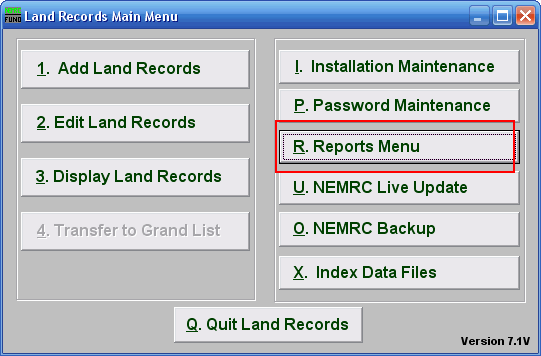
Click on "R. Reports Menu" from the Main Menu and the following window will appear:
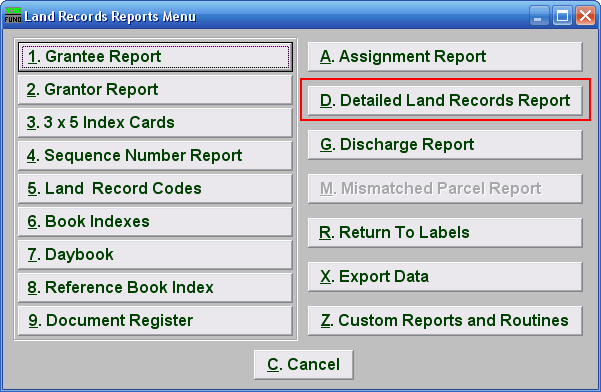
Click on "D. Detailed Land Records Report" from the Reports Menu and the following window will appear:
Detailed Land Records Report
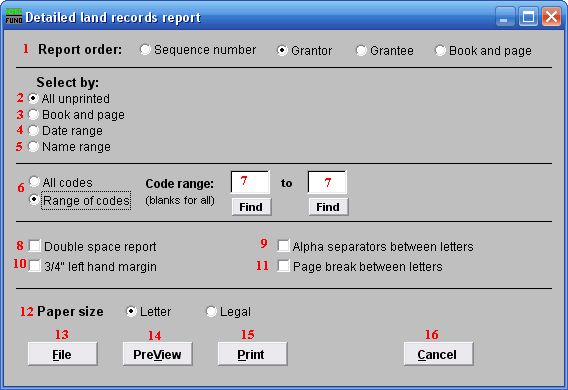
- Report order: Select the order to print the cards in: Sequence Number is an assigned entry number order by the system, Grantor/Grantee is based upon the name as entered on those lines, Book and page use the references made on the record.
- All unprinted: Select this option to print for all records that have not been previously marked as printed by the system.
- Book and page: Select this option to produce cards for a specific book and page range. Refer to the "Book and Page" section below.
- Date range: Select this option to produce cards for a specific Date range. Refer to the "Date Range" section below.
- Name range: Select this option to produce cards for a range of Grantees or Grantors. Refer to the "Name Range" section below.
- All codes OR Range of codes: Select the choice of reporting on all codes or a specific range of codes.
- Code range: Enter a specific range of codes to report or leave these fields empty to report on all codes. You may pick your start and ending ranges from a list by using the "Find" button.
- Double space report: Click this box to have this report be double-spaced instead of single-spaced. This is for marking up or visual appearance.
- Alpha separators between letters: Check this box to have the system create a break in the listings between changes in the first letter of the name.
- 3/4" left hand margin: Check this box to have the system create a three quarter inch left margin for binding of the report.
- Page break between letters: Check this box to have the system start each beginning letter on a new page when reporting.
- Paper size: Select which size paper you wish to print this report on. If you select legal, you must also change the printer properties to loaded from the legal tray when clicking on the print button.
- File: Click this button to save this report on this computer. Refer to GENERAL FILE for more information.
- PreView: Click this button to preview this report. Refer to GENERAL PREVIEW for more information.
- Print: Click this button to print this report. Refer to GENERAL PRINTING for more information.
- Cancel: Click "Cancel" to cancel and return to the Reports Menu.
Book and Page
If you chose "Book and page" the following screen is what you'll see:
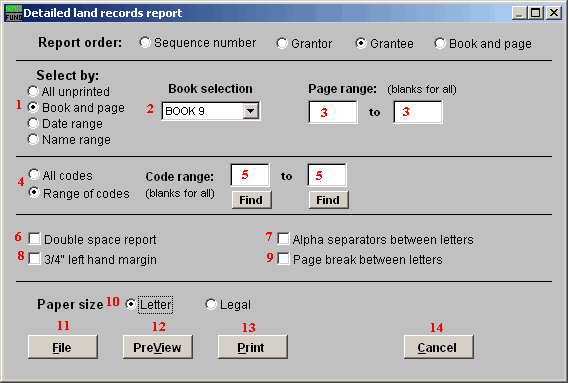
- Book and page: Select this option to produce cards for a specific book and page range.
- Book selection: Select the book you would like to produce cards for. Choose "All Books" to use all books.
- Page range: If you choose a book, then you may choose a page range, or leave blank to print for the entire book.
- All codes OR Range of codes: Select the choice of reporting on all codes or a specific range of codes.
- Code Range: This option becomes available if you choose "Range of codes." Enter a specific range of codes to report or leave these fields empty to report on all codes. You may pick your start and ending ranges from a list by using the "Find" button.
- Double space report: Click this box to have this report be double-spaced instead of single-spaced. This is for marking up or visual appearance.
- Alpha separators between letters: Check this box to have the system create a break in the listings between changes in the first letter of the name.
- 3/4" left hand margin: Check this box to have the system create a three quarter inch left margin for binding of the report.
- Page break between letters: Check this box to have the system start each beginning letter on a new page when reporting.
- Paper size: Select which size paper you wish to print this report on. If you select legal you must also change the printer properties to "loaded from the legal tray" when clicking on the print button.
- File: Click this button to save this report on this computer. Refer to GENERAL FILE for more information.
- PreView: Click this button to preview this report. Refer to GENERAL PREVIEW for more information.
- Print: Click this button to print this report. Refer to GENERAL PRINTING for more information.
- Cancel: Click "Cancel" to cancel and return to the Reports Menu.
Date Range
If you chose "Date range" the following screen is what you'll see:
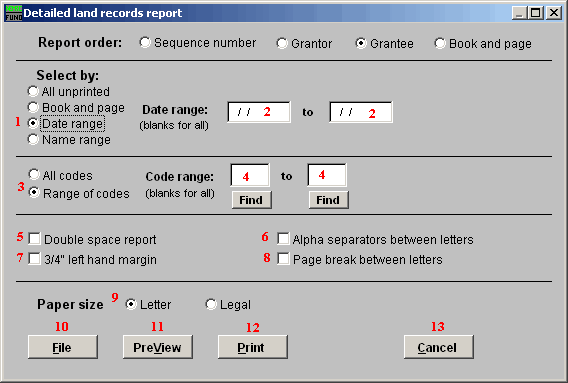
- Date range: Select this option to produce cards for a specific Date range.
- Date range: Enter a beginning and ending date range of data for card printing. Leave these fields blank to print for all dates.
- All codes OR Range of codes: Select the choice of reporting on all codes or a specific range of codes.
- Code range: This option becomes available if you choose "Range of codes." Enter a specific range of codes to report or leave these fields empty to report on all codes. You may pick your start and ending ranges from a list by using the "Find" button.
- Double space report: Click this box to have this report be double-spaced instead of single-spaced. This is for marking up or visual appearance.
- Alpha separators between letters: Check this box to have the system create a break in the listings between changes in the first letter of the name.
- 3/4" left hand margin: Check this box to have the system create a three quarter inch left margin for binding of the report.
- Page break between letters: Check this box to have the system start each beginning letter on a new page when reporting.
- Paper size: Select which size paper you wish to print this report on. If you select legal, you must also change the printer properties to "loaded from the legal tray" when clicking on the print button.
- File: Click this button to save this report on this computer. Refer to GENERAL FILE for more information.
- PreView: Click this button to preview this report. Refer to GENERAL PREVIEW for more information.
- Print: Click this button to print this report. Refer to GENERAL PRINTING for more information.
- Cancel: Click "Cancel" to cancel and return to the Reports Menu.
Name Range
If you chose "Name range" the following screen is what you'll see:
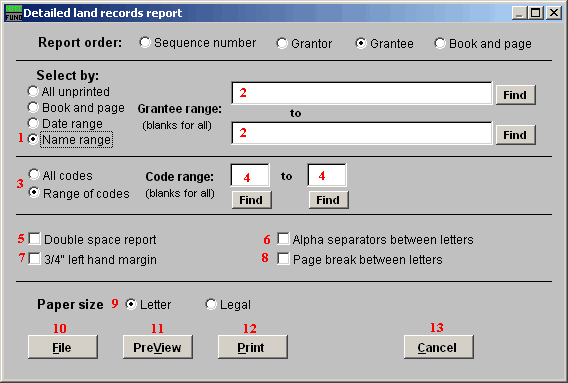
- Name range: Choose this option to have this report be on a range of Grantee or Grantors.
- Grantee range: Enter the specific range of Grantee or Grantor names to report. You may pick your start and ending ranges from the list by using the "Find" button.
- All codes OR Range of codes: Select the choice of reporting on all codes or a specific range of codes.
- Code range: This option becomes available if you choose "Range of codes." Enter a specific range of codes to report or leave these fields empty to report on all codes. You may pick your start and ending ranges from a list by using the "Find" button.
- Double space report: Click this box to have this report be double-spaced instead of single-spaced. This is for marking up or visual appearance.
- Alpha separators between letters: Check this box to have the system create a break in the listings between changes in the first letter of the name.
- 3/4" left hand margin: Check this box to have the system create a three quarter inch left margin for binding of the report.
- Page break between letters: Check this box to have the system start each beginning letter on a new page when reporting.
- Paper size: Select which size paper you wish to print this report on. If you select legal, you must also change the printer properties to "loaded from the legal tray" when clicking on the print button.
- File: Click this button to save this report on this computer. Refer to GENERAL FILE for more information.
- PreView: Click this button to preview this report. Refer to GENERAL PREVIEW for more information.
- Print: Click this button to print this report. Refer to GENERAL PRINTING for more information.
- Cancel: Click "Cancel" to cancel and return to the Reports Menu.
