
Planning/Zoning Support Document
Open as: PDF or Word Document
I. Installation Options
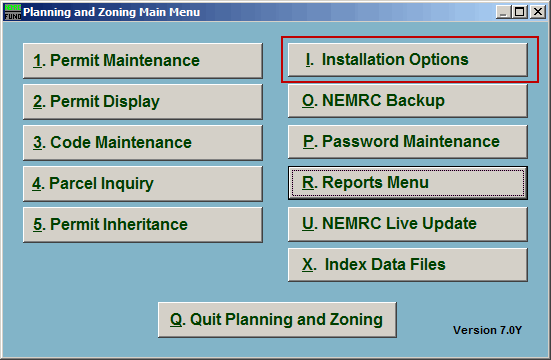
Click on "I. Installation Options" from the Main Menu and the following window will appear:
Installation Options
The "General" tab
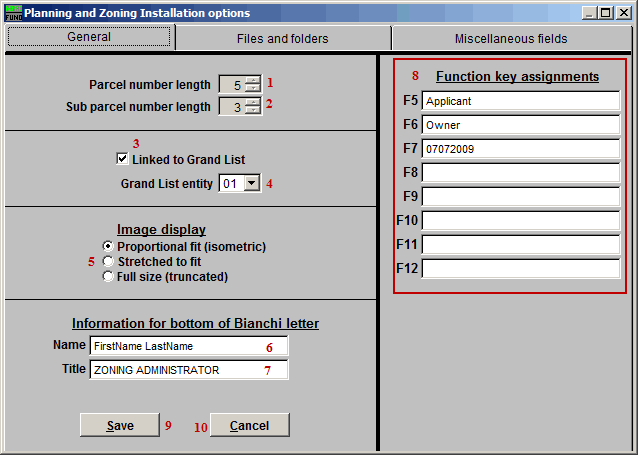
- Parcel number length: Select the maximum length for Parcel numbers. The value should match the setting in the Grand List when linked.
- Sub parcel number length: Select the maximum length for the Sub Parcel number. The value should match the setting in the Grand List when linked.
- Linked to Grand List: Click to check this box if the Planning and Zoning module is to be linked to the Grand List module.
- Grand List entity: Select the Grand List entity that this Planning and Zoning entity is to be linked to when item 3 has been checked.
- Image display: Select whether the images in the reports are adjusted Proportionally, are stretched, or are cropped to fit on the page.
- Name: This is the name that will appear on the bottom of the Bianchi letter.
- Title: This is the title of the person from item 6.
- Function Keys: Each of the F Key fields (F5-F12) is linked to the associated F-Key on your keyboard. In other words, when you hit the "F_" key on your keyboard, the text entered for that F-Key will appear.
- Save: Click this button to save changes and return to the Main Menu.
- Cancel: Click this button to cancel and return to the Main Menu without saving.
The "Files and Folders" tab
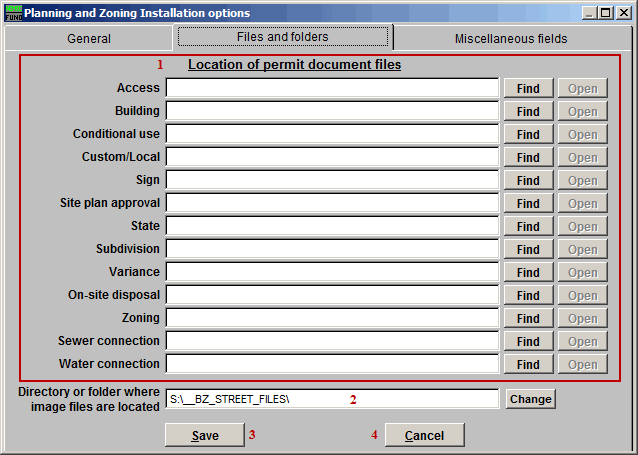
- Location of permit document files: Use the "Find" buttons to locate where the Permit documents are on this computer.
- Directory or folder where image files are located: Click "Change" to locate where the images used for the Permits are located.
- Save: Click this button to save changes and return to the Main Menu.
- Cancel: Click this button to cancel and return to the Main Menu without saving.
The "Miscellaneous Fields" tab
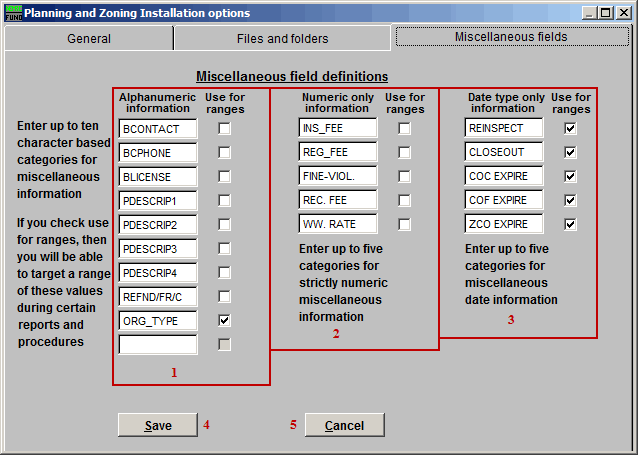
- Alphanumeric information: Enter up to ten alphanumeric categories to keep track of for all Permits. Check the box next to the field to use the category as a Range when doing reports.
- Numeric only information: Enter up to five numerical categories to keep track of for all Permits. Check the box next to the field to use the category as a Range when doing reports.
- Date type only information: Enter up to five Date categories to keep track of for all Permits. Check the box next to the field to use the category as a Range when doing reports.
- Save: Click this button to save changes and return to the Main Menu.
- Cancel: Click this button to cancel and return to the Main Menu without saving.
