
Utility Billing Support Document
Open as: PDF or Word Document
5. Edit Postings / Adjustments: 1. Edit Postings
Table of Contents
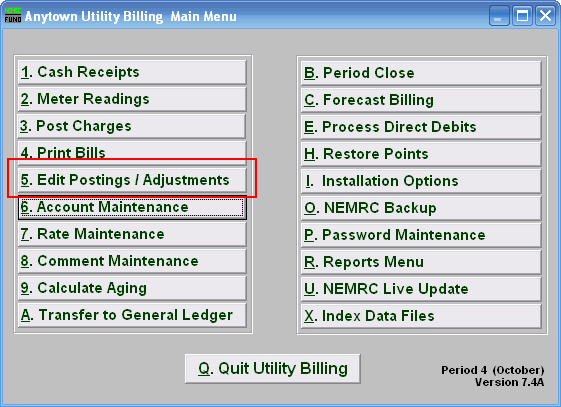
Click on "5. Edit Postings / Adjustments" from the Main Menu and the following window will appear:
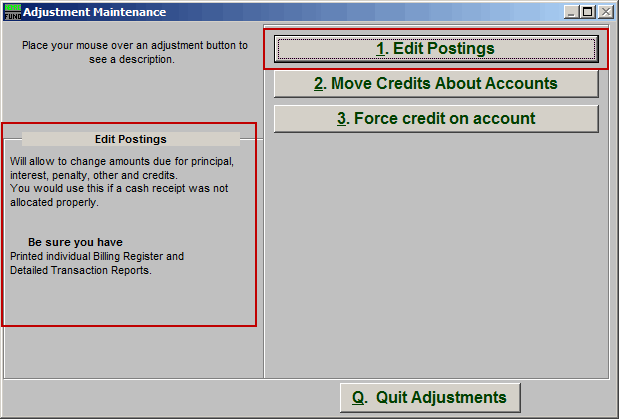
Consider the description that appears when you place the mouse over "1. Edit Postings." Click "1. Edit Postings" and the following window will appear:
Edit Postings
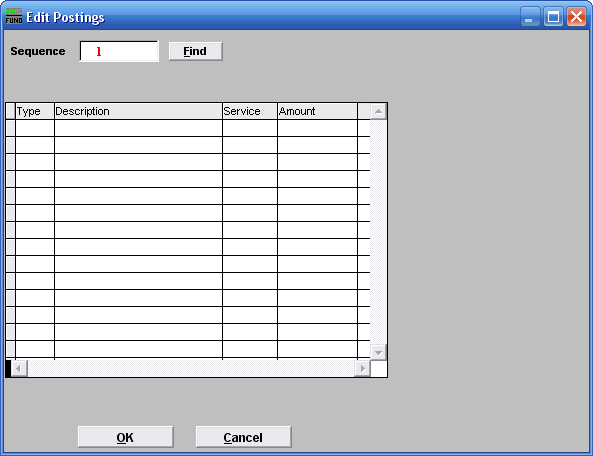
- Sequence : Type in a sequence number, and click "Find". The following window will appear:
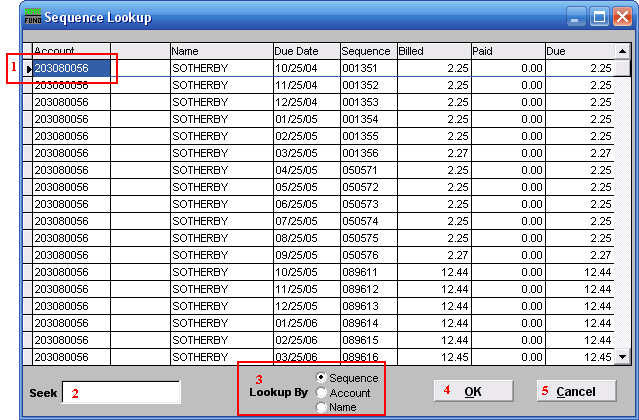
- The arrow and blue outline represent the highlighter. This will appear if you click on a posting.
- Seek: Begin to type an Account Number/Sequence/Name into the field and the list will adjust so that the closest match to what you are typing will appear at the top of the window. Once you see the posting you wish to edit, click on it to highlight it.
- Lookup By: Click the circle to the left of Sequence/Account/Name to have the list sort by that method.
- OK: Once you have chosen the posting, and it is highlighted, click on "OK" to continue to edit that posting.
- Cancel: Click "Cancel" to return to the previous menu.
The following window will appear:
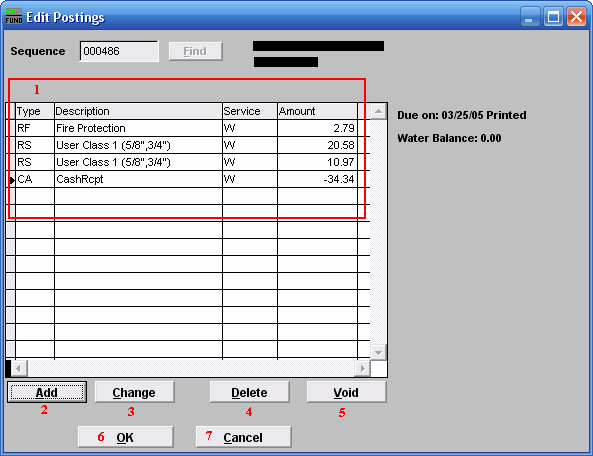
- Note the various postings in the fields.
- Add: Click to add a new posting. The below window will appear.
- Change: Click to change the amount for the highlighted charge. Previously printed charges are not changeable. The below window will appear, with only the "Amount" option showing.
- Delete: Delete the selected posting.
- Void: Click to void the selected posting. Bills where no cash or credit has been applied may be made VOID.
- OK: Click "OK" when you have finished editing the charges on this posting. You will return to the previous window.
- Cancel: Click "Cancel" to cancel anything done, and return to the previous window.
Add/Change Posting
If you chose to Add a posting, the following window will appear. If you chose to Change a charge, only the "Amount" option will appear.

- Mi (Misc Charge): Click the circle to the left of Misc Charge if this is a charge.
- Ad (Adjustment - enter as a negative): Click the circle to the left of Adjustment if this is an adjustment. If it is an adjustment, be sure that you enter the "Amount" as a negative (use the - key on your keyboard).
- Reason: Give a very brief reason for the Adjustment or Charge.
- Service: Choose what service this Charge or Adjustment is for. Services are defined in "I. Installation" off the Main Menu.
- Amount: Enter the amount to be charged, or the amount to be adjusted. If its an Adjustment, be sure to enter as a negative.
- OK: Click "OK" to save this posting.
- Cancel: Click "Cancel" to cancel creating/changing this posting.
