
Grand List Support Document
Open as: PDF or Word Document
R. Reports Menu: H. Export Data
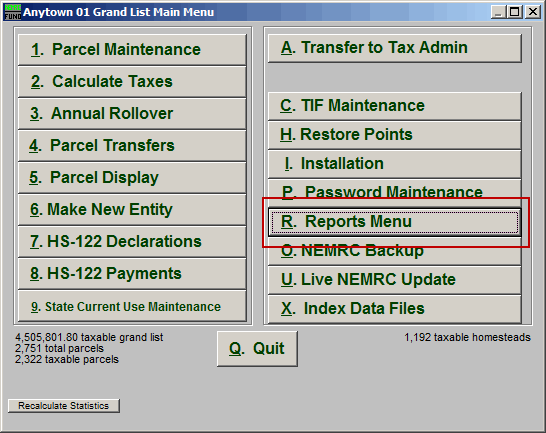
Click on "R. Reports Menu" from the Main Menu and the following window will appear:
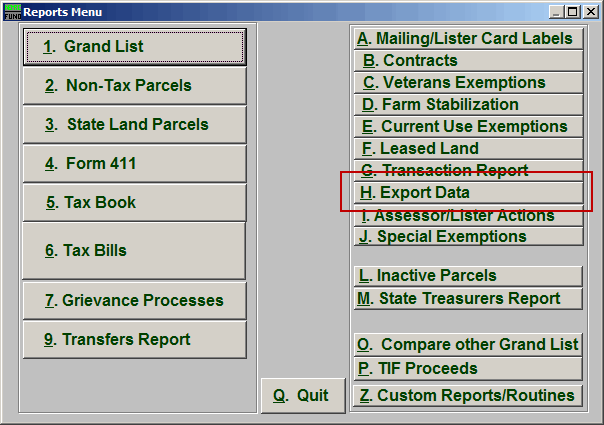
Click on "H. Export Data" from the Reports Menu and the following window will appear:
Export Data
The "General" tab

- Real Estate OR Personal OR Both: Select whether this export will be for Real Estate, Personal, or Both.
- Equipment OR Inventory OR Both: Select whether this export will be for Equipment, Inventory, or Both.
- Individual OR Range OR All Parcels: Select whether this export will be for an Individual Parcel, Range of Parcels, or All Parcels.
- Order: Parcel # OR Owner: Select which order this export will created in.
- Single Tax Rate: Select a single tax rate from the drop down menu. Only Parcels with this tax rate will appear on the report. This option is available only when a variable tax rate has been set up in "I. Installation Maintenance."
- District Select: Select the District range to include in this report.
- R: Residential: Check this box to restrict the report to all R1 and R2 type listings.
- MH: Mobile Home: Check this box to restrict the report to all MHU and MHL type listings.
- V: Vacation: Check this box to restrict the report to all V1 and V2 type listings.
- FoxPro Filter Expression: A conditional reporting expression developed with NEMRC support. This evaluates Parcel information to determine if the Parcel should be included. Contact NEMRC support to learn more about this option.
- Start with: This will appear if you chose "Individual" or "Range" in item 3. Choose the Parcel you wish to start with.
- End with: This will appear if you chose "Range" in item 3. Choose the Parcel you wish to end with.
- Print Condensed: Click this button to print the report. This is different from the "Print" option in that it will use less paper for the same report.
- File: Click this button to save on this computer. Refer to GENERAL FILE for more information.
- Cancel: Click "Cancel" to cancel and return to the Reports Menu.
The "Fields" tab
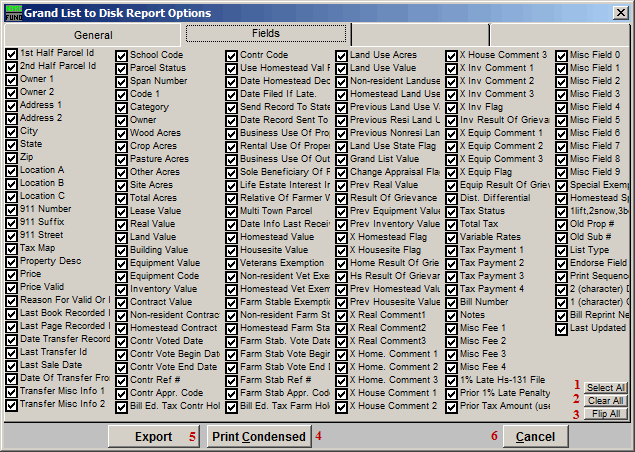
- Select All: Click this button to select every field.
- Clear All: Click this button to un-select every field.
- Flip All: Click this button to un-select any field that is selected, and select any field that is un-selected.
- Print Condensed: Click this button to print the report. This is different from the "Print" option in that it will use less paper for the same report.
- Export: Click this button to Export. The window shown below will appear.
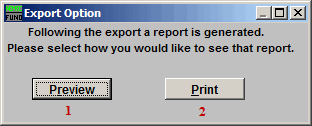
This window will appear after you click "Export." Choose whether you want to see a preview report for what was Exported, or if you want to Print a report of what was Exported.
- Preview: Click this button to preview. Refer to GENERAL PREVIEW for more information.
- Print: Click this button to print. Refer to GENERAL PRINTING for more information.
After you choose which Report method you want, the following window will appear:
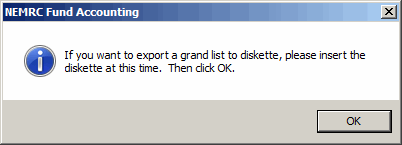
If you want to Export Grand List to a diskette (or CD) then insert the diskette/CD now, then click "OK." If you want to Export Grand List to a flash-drive, just click "OK."
The following window will appear:
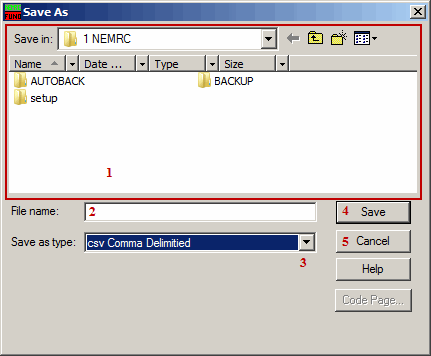
- Save in: Locate the folder to Export to.
- File name: Type the File name to save the Export as into the "File name:" field.
- Save as type: Select what type of file to save this Export as, by using the drop down list next to "Save as type:"
- Save: Click "Save" when you are finished.
- Cancel: Click "Cancel" to cancel the Export.
The Report method that you selected earlier will now take place.
