
Accounts Payable Support Document
Open as: PDF or Word Document
1. Invoice Maintenance
Table of Contents
The "General Ledger Reference Accounts" tab
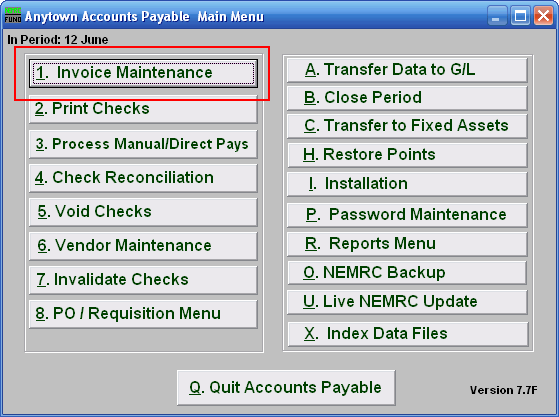
Click on "1. Invoice Maintenance" from the Main Menu and the following window will appear:
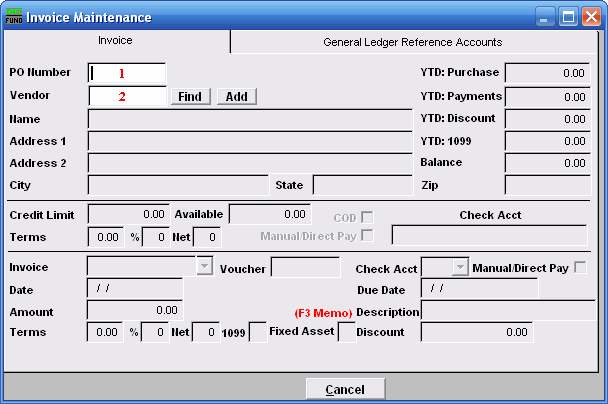
Invoice Maintenance
- PO Number: If you using the Purchase Order System linked to the Accounts Payable you can enter the Purchase Order number and all associated information from the Purchase Order system will be posted on the invoice screen. If the Purchase Order System is not being used then you may skip this field.
- Vendor: Enter the Vendor for this invoice. If the Vendor already exists in the Vendor file, the company name, address and historical information will automatically appear. Also the credit limit terms and checking account set as a default in Vendor Maintenance will appear. If the Vendor does not already exist, you will need to click "Add," and the screen from Vendor Maintenance will appear. Fill this screen out with the appropriate information, and click "OK." For more information on the Vendor Maintenance screen, refer to 6. Vendor Maintenance. For more information on Vendor Lookups, refer to AP GENERAL VENDOR MAINTENANCE.
A warning may appear, this warning is set in "6. Vendor Maintenance" using the "Invoice/PO Warning Memo" option.
Another warning may appear indicating that W9 information is blank or expired. This setting can be set in "I. Installation" off the Main Menu.
The "Invoice" tab
This is the first screen that appears. The invoice screen allows the user to enter all information about the invoice and will have any default information that was set up in Vendor Maintenance and historical information about the Vendor.
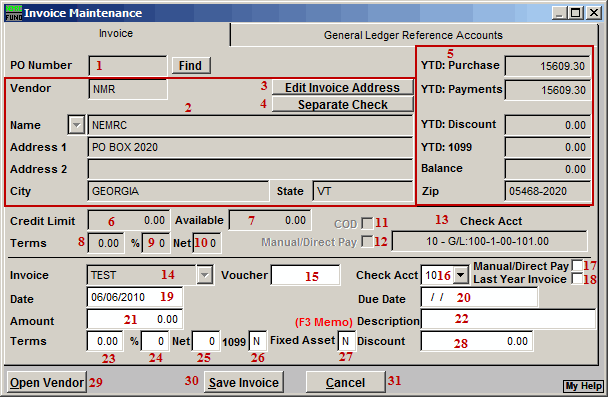
- PO Number: Enter the reference number for manual purchase orders if used. If you referenced a system purchase order then this field is not accessible.
- Fields are automatically filled in.
- Edit Invoice Address: Click this button if you wish to change the address for this invoice payment. Each unique invoice address will result in a unique check printing. This is common when Vendor payments must be sent to different locations. A previously used address can be selected from the drop down that appears next to the company name field.
- Separate Check: Click on this button to set this invoice to print a separate check when paid. Some vendors what each invoice to be paid by individual checks.
- Fields are automatically filled in.
- Credit Limit: This field shows the total credit limit from Vendor maintenance.
- Available: This field shows the available credit from Vendor maintenance.
- %: This shows the percentage discount from Vendor maintenance.
- Days: This shows the number of days allowed from discount payments from Vendor maintenance.
- Net Days: This shows the terms for net payment from Vendor maintenance.
- COD: This shows if the Vendor is defaulted for cash on delivery from Vendor maintenance.
- Manual/Direct Pay: This shows if the Vendor is defaulted for manual/direct pay from Vendor maintenance.
- Check Acct: This shows the default checking account from installation maintenance set for this Vendor.
- Invoice: For a new invoice: Enter the invoice number from the Vendor's invoice. You must enter an invoice number, if none is on the Vendor's invoice you must create an invoice number. For example 2007-12-31 the date of the invoice. The same Vendor code can not have the same invoice number used twice. To edit an existing invoice: Enter the invoice number you have already posted for this Vendor, you may use the drop down menu to select the existing invoice number.
- Voucher: If your organization uses voucher numbers, input that number in this field.
- Check Acct: Enter the checking account code (as set up in "I. Installation") that will pay this invoice. Use the drop down menu to view choices of the different checking account codes that have been set up.
- Manual/Direct Pay: An "N" in this box will print the check for this invoice through the check printing process. A manual/direct pay would be an electronic or handwritten check. If this invoice is a manual/direct pay a "Y" should appear in this box. An example of a manual/direct pay would be the IRS; You do not write a check to the IRS however, you approve the money being withdrawn from your account to pay your tax liability. There are very few handwritten checks in most municipalities or schools but an example of a manual/direct pay is a check to the post office for postage. Once again, in Vendor Maintenance you may set this up as a default for any invoice that will be posted with this Vendor code.
- Last Year Invoice: When checked, this invoice will be booked to last year as a reference account in Accounts Payable.
- Date: The actual date of the invoice.
- Due date: The due date is a method of selecting bills to be paid. Enter the date the invoice will be approved for payment. Be sure to follow your policy for scheduling payments.
- Amount: Enter the gross amount for this invoice.
- Description: A description entered in this field will appear on a check warrant report to provide more detail about services rendered.
- %: This will default to the terms set up in Vendor Maintenance.
- Days: This will default to the terms set up in Vendor Maintenance.
- Net Days: This will default to the terms set up in Vendor Maintenance.
- 1099: This will default to the terms set up in Vendor Maintenance. You may edit this field. Enter "Y" for yes to accumulate for 1099 calendar year totals or "N" to not accumulate for 1099 calendar year totals.
- Fixed Asset: Click this box to allow this invoice to be transferred to the Fixed Assest module when linked in Installation Maintenance.
- Discount: Enter a discount amount if applicable.
- Open Vendor: Click this button to open this vendor in "6. Vendor Maintenance."
- Save Invoice: Click this button to save this invoice.
- Cancel: Click "Cancel" to cancel and return to the Main Menu.
The "General Ledger Reference Accounts" tab
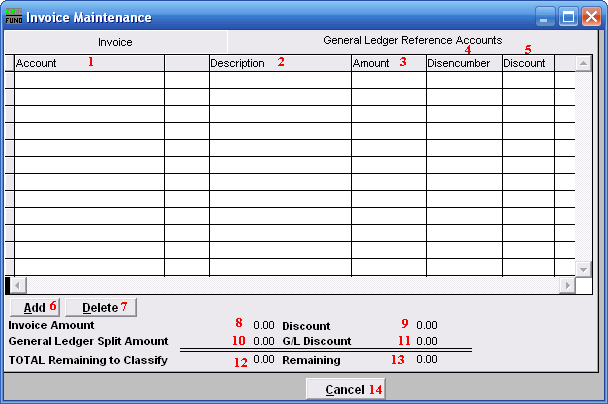
The "General Ledger Reference Accounts" tab is used to input General Ledger account number(s) that total to the amount due on the invoice screen.
- Account: Enter the General Ledger reference account for payment of this invoice. Multiple accounts may be used by entering one line at a time.
- Description: The account number description from the General Ledger will appear in this column for each line.
- Amount: Enter the dollar amount of the invoice that is allotted for each General Ledger account number.
- Disencumber: If you are using the purchase order system the amount to disencumber will appear. If you have encumbered an account in your General Ledger through posting transactions, enter the amount you wish to disencumber for this line item.
- Discount: The discount amount will be displayed from the invoice screen, edit this field if you are using several General Ledger accounts and you will spread the discount between those accounts.
- Add: Click this button to add additional General Ledger accounts to be referenced for this invoice.
- Delete: Select a line with a reference account and click this button to delete the reference from this invoice.
- Invoice Amount: This field shows the total invoice to be distributed.
- Discount: This field shows the discount amount to be distributed.
- General Ledger Split Amount: This field shows the amount of the total invoice that has been distributed.
- G/L Discount: This field shows the amount of the discount taken that has been distributed.
- TOTAL Remaining to Classify: This will be zero when the referenced amounts equal the amount entered in the invoice tab.
- Remaining: This field shows the remaining amount of the total invoice that needs to the distributed.
- Cancel: Click this button to cancel this invoice entry and remove the invoice from the system.
