
Accounts Payable Support Document
Open as: PDF or Word Document
3. Process Manual/Direct Pays
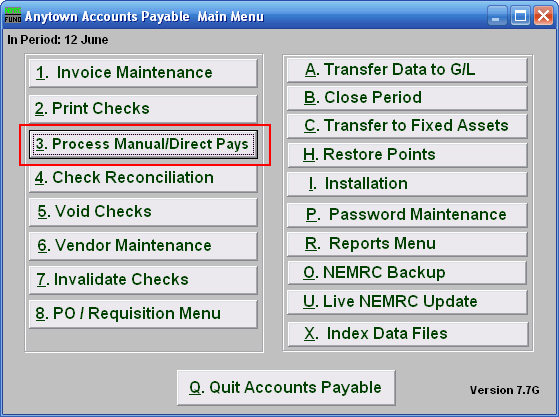
Click on "3. Process Manual/Direct Pays" from the Main Menu and the following window will appear:

You should choose "Yes" when this notice appears. It is always very important that you backup your data. Keep in mind that this only backs up the data for the module and entity that you are in. Keep in mind that Restore Points are not a substitute for the regular backup routine.
After the Restore Point is made, the following window will appear:
Process Manual/Direct Pays
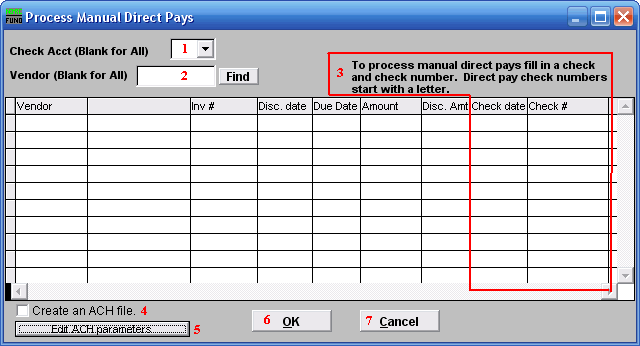
- Check Acct (Blank for All): Type in the Check Account Code or click on the drop down arrow and choose from the selection OR leave Blank for All Check Accounts.
- Vendor (Blank for All): Type in the Vendor code or click on the drop down arrow and choose from the selection OR leave Blank for All Vendors.
- To process manual direct pays...: Record the issue date and check number reference for each invoice paid on the list. Reference a check number starting with a letter like "E" then a value for those invoices that you will create an ACH file to process. All check dates for the ACH records MUST be the same date.
- Create an ACH file: Check this box after performing step 3 to create the ACH file. A window will appear allowing you to save this file in a location of your choice.
- Edit ACH Parameters: Click this button to edit the ACH parameters, the window shown below will appear.
- OK: You must check off item 4 to produce an ACH file if needed before you click on this button. Click this button to save and return to the previous screen.
- Cancel: Click "Cancel" to cancel and return to the previous screen.
Edit ACH Parameters
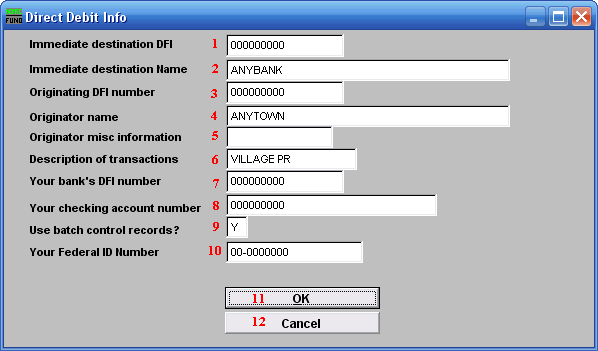
- Immediate destination DFI: Enter your banks routing number in this field. Some banks prefer you enter your organizations Federal ID number.
- Immediate destination Name: Enter the name of your bank.
- Originating DFI number: Enter your banks routing number in this field.
- Originator name: Enter the name as it appears on your bank account.
- Originator misc information: Enter information to help is identifying this batch. This can be left blank.
- Description of transactions: Enter information to help in identifying this batch. I.E. WARR080304. This should not be left blank.
- Your bank's DFI number: Enter your banks routing number in this field.
- Your checking account number: Enter your check account number assigned by the bank.
- Use batch control records?: Batch control record use is dependant on your bank and their application processing needs. This option will default to the last answer selected.
- Your Federal ID Number: Enter your Federal ID number. This is used a test against your account for processing.
- OK: Click this button to save and return to the previous screen.
- Cancel: Click "Cancel" to cancel and return to the previous screen.
