
Accounts Receivable Support Document
Open as: PDF or Word Document
5. Invoice Maintenance
Table of Contents
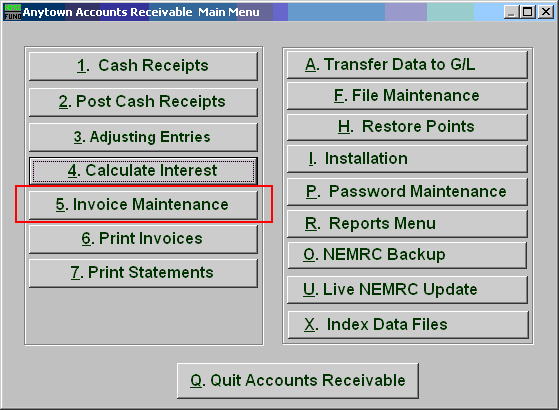
Click on "5. Invoice Maintenance" from the Main Menu and the following window will appear:
Invoice Maintenance
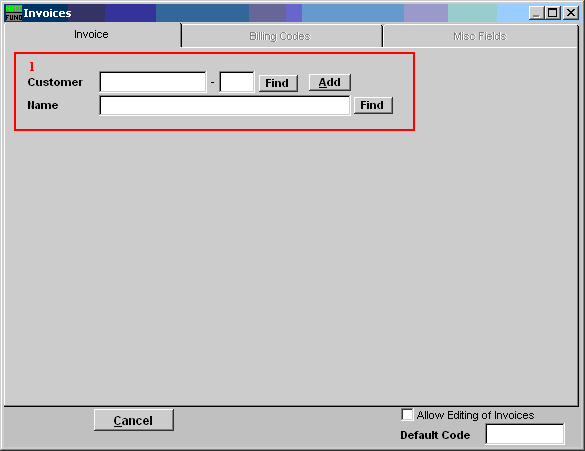
- Type in the Customer ID OR Name OR click the "Find" button to select from the Lookup window OR click on "Add" to add a new Customer. When adding a new customer refer to the "File Maintenance" (under the "Customer File" section) for instructions.
The "Invoice" tab

- Invoice Date: Enter the date of the invoice.
- Invoice Amt: Enter the amount of the invoice. You now need to click on the Billing Codes Tab and follow the instructions below.
- Save: Click "Save" to save changes and return to the previous screen.
- Cancel: Click "Cancel" to cancel and return to the previous screen.
- Save and Print: Click this button to Save changes and Print a report of the changes.
- Allow Editing of Invoice: Invoices cannot be edited unless this option is checked off.
- Default Code: Enter a code that you wish all new invoices to default to. This makes creating several invoices for the same code much easier.
The "Billing Codes" tab
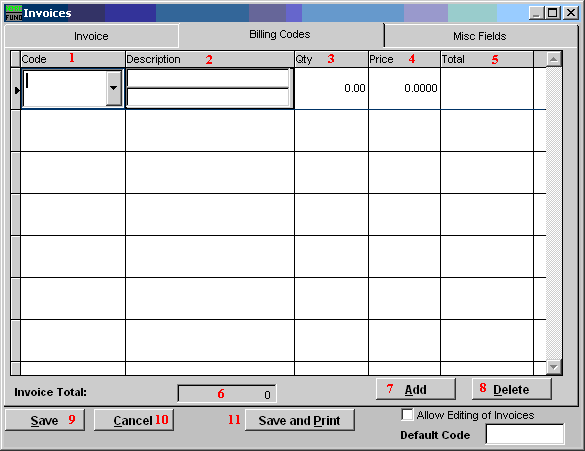
- Code: Enter the Code or use the drop down arrow and select from there. Codes are defined in the "File Maintenance - Code Maintenance" document.
- Description: Enter a Description of the Code. This is two lines of 40 characters.
- Qty: Enter the Quantity of the item.
- Price: Enter the Unit Price of the line item.
- Total: This field will automatically be filled in.
- Invoice Total: This field will automatically be filled in.
- Add: Click this button to add a new code.v
- Delete: Click on a line to select then click this button to delete the selected code.
- Save: Click "Save" to save changes and return to the previous screen.
- Cancel: Click "Cancel" to cancel and return to the previous screen.
- Save and Print: Click this button to Save changes and Print the invoice.
The "Misc Fields" tab
- Misc Fields: Type in any extra information here. These fields are defined on "I. Installation."
- Save: Click "Save" to save changes and return to the previous screen.
- Cancel: Click "Cancel" to cancel and return to the previous screen.
- Save and Print: Click this button to Save changes and Print the invoice.
