
Cash Receipts Support Document
Open as: PDF or Word Document
I. Installation Options
Table of Contents
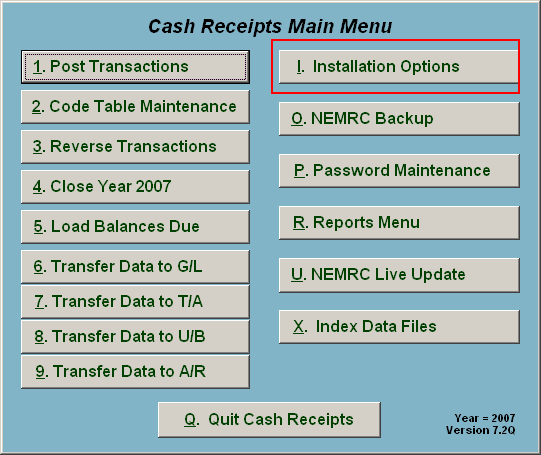
Click on "I. Installation Options" from the Main Menu and the following window will appear:
Installation Options
The "General" tab
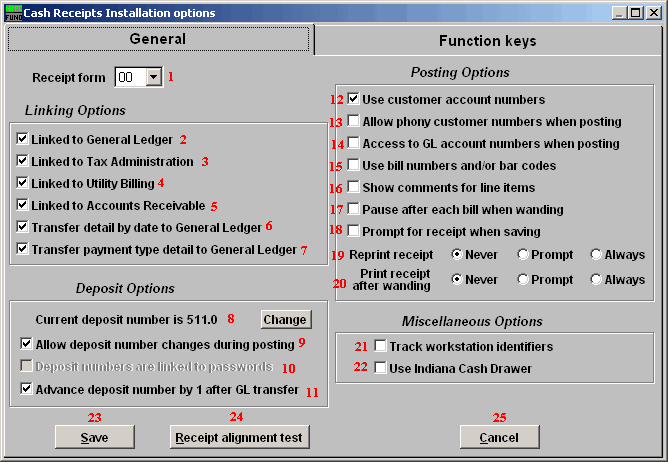
- Receipt form: Forms are designed specific for your needs. Some pre-defined forms in the application may work for your site. NEMRC support will work through helping you selecting the form needed.
- Linked to General Ledger: Check this box to link General Ledger accounts to cash codes.
- Linked to Tax Administration: Check this box to allow cash codes to link to Tax Administration and load customer balances from there.
- Linked to Utility Billing: Check this box to allow cash codes to link to utility billing and load customer balances from there.
- Linked to Accounts Receivable: Check this box to allow cash codes to link to Accounts Receivable and load customer balances from there.
- Transfer detail by date to General Ledger: Check this box to cause all transactions to record in the other modules with the same date as posted in this module. Otherwise the transaction date will post as the date transferred.
- Transfer payment type detail to General Ledger: Check this box for the system to record a separate transaction to the deposit account that reflects the different payment types allowed such as cash, check, debit card and credit card.
- Current deposit number is: Deposit numbers can be used to group all cash activities for reporting as a group. Options include manually changing the number during entry of transactions, manually changing by the button here in installation or the system changing as a function after transferring activities to the General Ledger.
- Allow deposit number changes during posting: Checking this box will open the deposit number field during the recording of cash activities.
- Deposit numbers are linked to passwords: This option can be opened up when each user is tracking their own deposit number but sharing work stations. Each user is then required to have a unique sign in to work and must sign out when done.
- Advance deposit number by 1 after GL transfer: Check this box to have the system increment the deposit numbers automatically after the transfer of the open deposit to the General Ledger.
- Use customer account numbers: Check this box to open the customer account and sub-account fields on the posting screen. This requires defining the size of each field which NEMRC support will need to help you determine based on other options selected.
- Allow phony customer numbers when posting: Check this box to turn off validation of customer numbers during posting of cash activities.
- Access to GL account numbers when posting: Check this box to allow the changing of the credit general ledger account during the recording of cash activity.
- Use bill numbers and/or bar codes: Check this box to open the field to capture a bill number to automatically call a customer number, cash code and amount to the posting screen. This is not required for all activities but can be used when the billing source and cash receipts are set up for a site.
- Show comments for line items: Check this box to open a field so comments can be entered per item of cash transaction if needed.
- Pause after each bill when wanding: This option works in conjunction with item 15. The system will stop for a confirmation selection after each bill number entered or will automatically post the transaction.
- Prompt for receipt when saving: Check this box to have the system ask if you want a receipt each time you select item 23 "Save."
- Reprint receipt: Select which option you want the system to perform if you print a receipt.
- Print receipt after wanding: Select which option you want the system to perform if you record a transaction by bill number/bar code.
- Track workstation identifiers: Check this box to track each transaction by a specific work station it was recorded at. This will require you to define the work station ID and this value will be stored in a file requiring full access by the user signed in to the desktop: C:\NEMRCID\NEMRC.ID
- Use Indiana Cash Drawer: Check this box if you are using an Indiana Cash Drawer. This enables a control code to open the drawer when printing a receipt. Specific set up is required for this to work properly from your form defined in item 1.
- Save: Click this button to save on this computer. Refer to GENERAL FILE for more information.
- Receipt alignment test: Click this button to be prompted for a sample receipt to print.
- Cancel: Click "Cancel" to cancel and return to the previous screen.
The "Function keys" tab
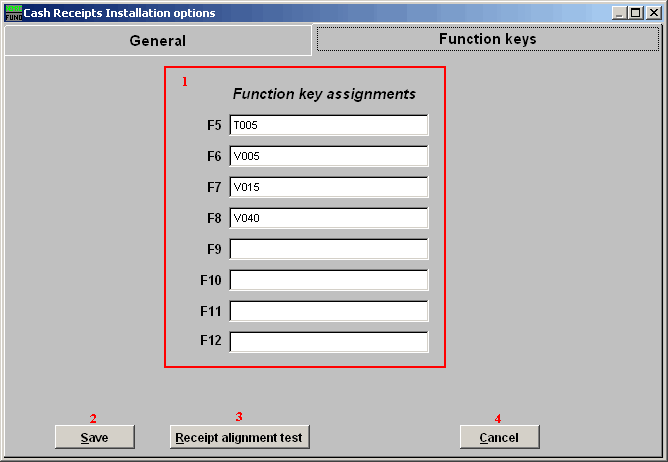
- Function key assignments: These are used to set shortcuts for common phrases for easy use, and to save you from having to retype something multiple times. When a value is assigned from the point of the cursor placement the function key with the assignment can be used to populate fields.
Each of these fields are linked to the "Function key" that is to its left. This means that when you hit the "F_" key on the keyboard, the text you entered for that "Function key" will appear. - Save: Click this button to save on this computer. Refer to GENERAL FILE for more information.
- Receipt alignment test: Click this button to be prompted for a sample receipt to print.
- Cancel: Click "Cancel" to cancel and return to the previous screen.
