
Grand List Support Document
Open as: PDF or Word Document
4. Parcel Transfers
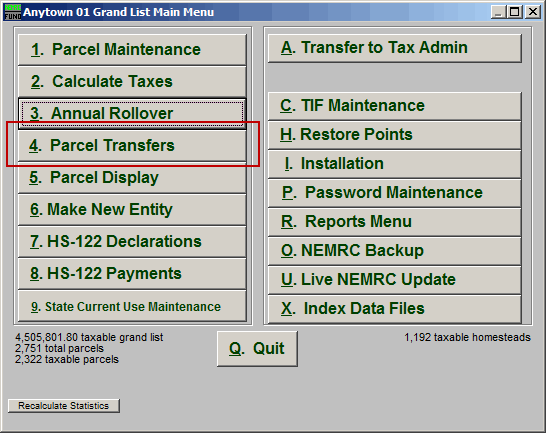
Click on "4. Parcel Transfers" from the Main Menu and the following window will appear:
Parcel Transfers
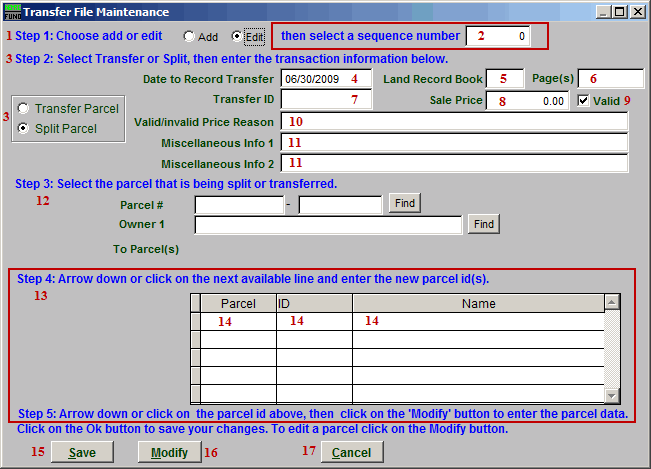
- Step 1: Choose add or edit: Choose whether you are adding a Parcel or Editing a Parcel. If you choose Edit, item 2 will appear.
- Select a sequence number: Select the Parcel to Edit.
- Step 2...: Select whether you want to Transfer the Parcel, or Split the Parcel. If you choose "Split Parcel" then item 13 will appear.
- Date to Record Transfer: Enter the date that this transfer took place on.
- Land Record Book: Enter the Land Record book that this Parcel appears in.
- Page(s): Enter the page(s) in the Land Record book that this Parcel appears on.
- Transfer ID: Enter an ID for this Transfer.
- Sale price: Enter the price that this Transfer was for.
- Valid: Click to un-check this box if the Sale Price is not Valid.
- Valid/Invalid Price Reason: Enter the reason that the Sale Price was or was not valid.
- Misc Info: Enter any miscellaneous information about this Transfer.
- Step 3: Locate the Parcel that is to be split or transferred.
- Step 4: This section appears if you chose "Split Parcel" in item 3. Click on the field (item 14) to create a new Parcel ID/Name.
- Click on the next available row to create a new Parcel ID and Name. This is where you define the new Parcels that the Parcel selected in item 12 (step 3) will be split in to. Then click on a Parcel ID, and click "Modify" (item 17) to enter the new Parcel's Data.
- Save: Click "Save" to save the changes.
- Modify: Select a Parcel from Step 4 (item 13) and click "Modify" to edit the Parcel data. The Parcel will then be opened in the Parcel Maintenance window. Refer to "1. Parcel Maintenance" for more information.
- Cancel: Click "Cancel" to cancel and return to the Main Menu.
