
Payroll Support Document
Open as: PDF or Word Document
D. Close Calendar Year
Table of Contents
Closing the Calendar Year
You will need to close the calendar year in order to print your W-2's. This is because the W-2 printing comes from the "last year" figures on the employee history screen. The figures are moved from "current year" figures to "last year" figures during the close of the calendar year.
You can print your W-2's any time after your year is closed. There is no limit to the number of times you can print W-2's, but you will be limited by how many forms you purchase.
Step 1
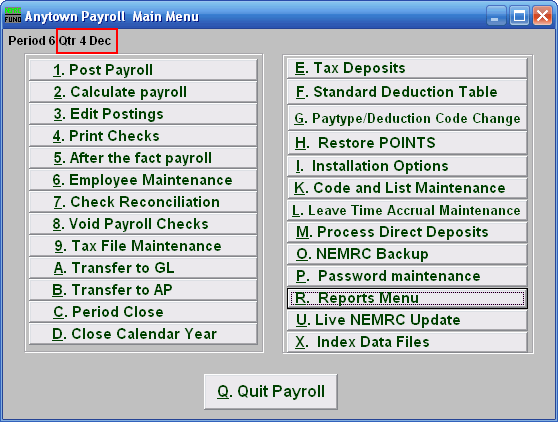
Make sure that all December payrolls are completed before you close the calendar year. Check the Payroll Main Menu screen (upper left hand corner) and verify that the following appears: "Qtr 4 Dec." If this does not appear, then the system will not allow you to close the year. The period shown is applicable to your fiscal year. Do not process any January payrolls until after the calendar year close is completed.
Step 2
Now you will want to have the following Reports (from "R. Reports Menu") printed for your records. These Reports may be printed at any time after the Calendar Year Close. The only Report that CANNOT be run after the Calendar Year close is "9. Employee Listing."
3. Check Register
9. Employee Listing
A. Employee wage summary
B. Employee tax summary
C. Employee deduction report
M. State unemployment report
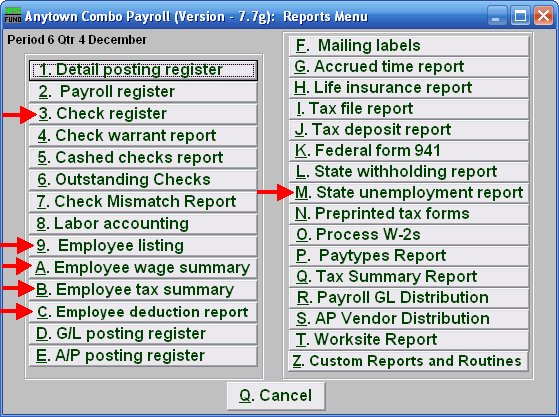
If you do not have these, print them now. While the "9. Employee Listing" report is lengthy, it is highly recommended that you print this report out in Detail. These reports should be filed with the information you keep on each employee.
Step 3
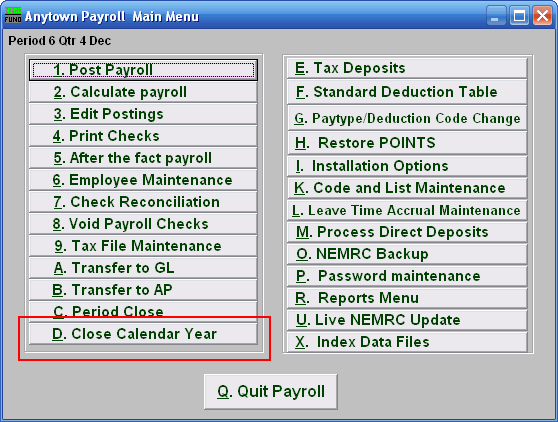
Now you are ready to close the calendar year. Click on "D. Close Calendar Year" on the Main Menu. Closing the Calendar Year will also close the period.
When prompted to create a Restore Point, choose "Yes." It is always very important that you backup your data. Keep in mind that this only backs up the data for the module and entity that you are in. Keep in mind that Restore Points are not a substitute for the regular backup routine.
After the Restore Point is made, the following window will appear:
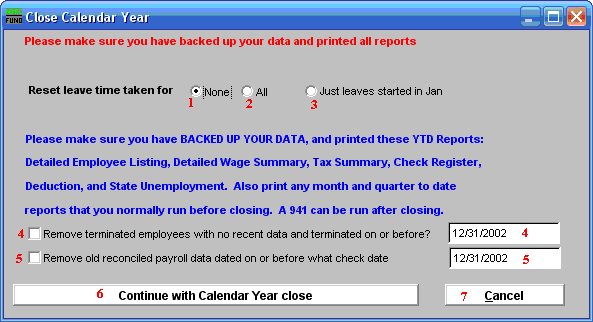
- None : None of the leave accrual or taken time values will be altered.
- All : All of the leave accrual values will be reduced by the taken value. The time taken value will be set to zero.
- Just leaves started in Jan : Only the leave times with a start date set in the month of January will have accrual values with be reduced by the taken value. The time taken value will be set to zero.
- Remove terminated... : Employees with a terminated status can be removed if their terminated date is on or before the date provided and no postings exist for the last two calendar years. The best practice is to retain a minimum of five full calendar years information. You must check off the box to actually have the removal take place.
- Remove old reconciled... : All check and posting records that have been reconciled on or before the date provided can be removed. The best practice is to retain a minimum of five full calendar years information. You must check off the box to actually have the removal take place.
- Continue with Calendar Year close : Click on this button to close the calendar year.
- Cancel : Click "Cancel" to cancel and return to the previous menu.
