
Tax Administration
Open as: PDF or Word Document
4. Move Credits About Accounts Years
Table of Contents
Move Credits About Accounts/Years
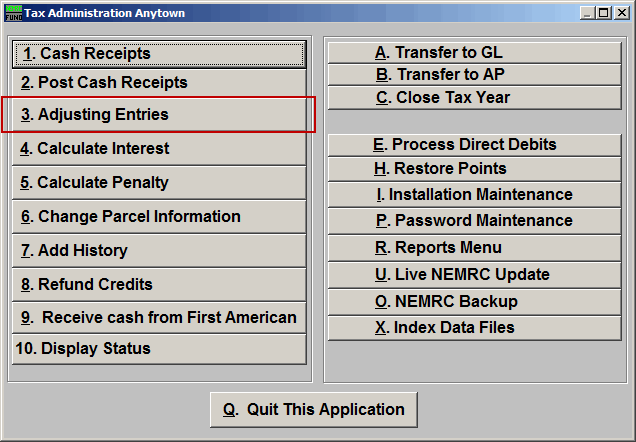
Click on "3. Adjusting Entries" from the Main Menu and the following window will appear:
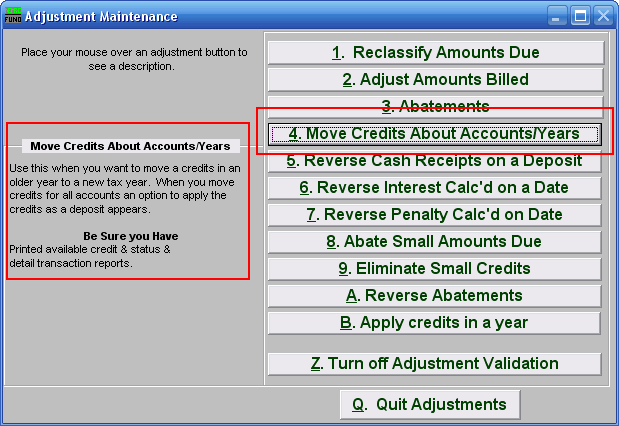
Consider the description that appears when you place the mouse over "4. Move Credits About Accounts/Years." Click "4. Move Credits About Accounts/Years." and the following window will appear:
Move Credits About Accounts/Years
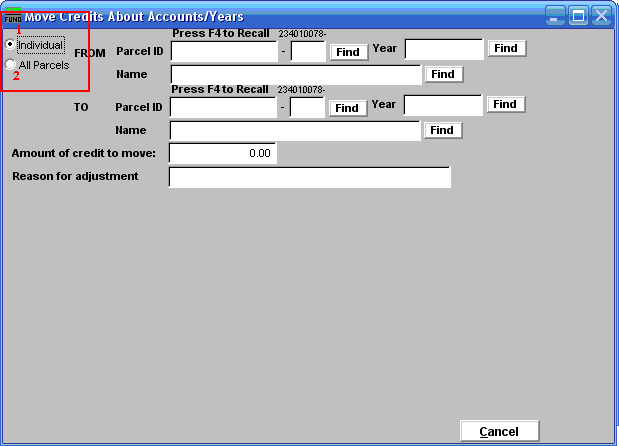
- Individual: Click to choose this option if you want to move Credits from an Individual Parcel to another Parcel.
- All Parcels: Click to choose this option if you want to move Credits for an entire Tax Year to another Tax Year.
Refer to the section below that relates to your choice:
Individual
If you chose "Individual" the following window will appear:
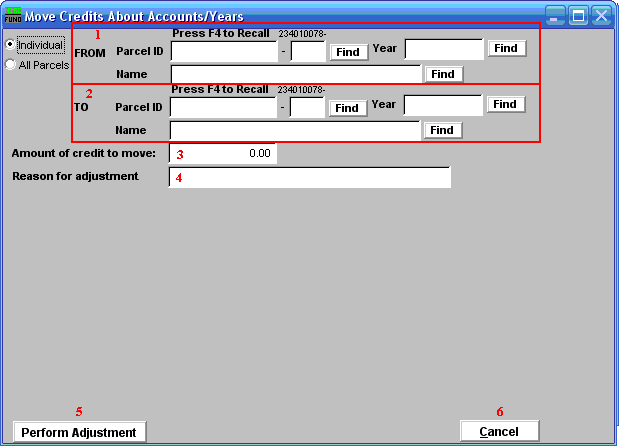
- FROM: Select the Parcel and Year you wish to move Credits from. For additional information on finding Parcels, refer to TA GENERAL PARCEL LOOKUPS.
- TO: Select the Parcel and Year you wish to move Credits to. For additional information on finding Parcels, refer to TA GENERAL PARCEL LOOKUPS.
- Amount of credit to move: Enter the amount of credit to move. This value can be found on the available credit report.
- Reason for adjustment: Define a comment to store with this transaction.
- Perform Adjustment: Click this button to have the software process this task.
- Cancel: Click "Cancel" to cancel and return to the previous screen.
All Parcels
If you chose "All Parcels" the following window will appear:

- FROM: Select the Tax Year you wish to move Credits from. For additional help with finding a Tax Year, refer to TA GENERAL TAX YEAR LOOKUPS.
- TO: Select the Tax Year you wish to move Credits to. For additional help with finding a Tax Year, refer to TA GENERAL TAX YEAR LOOKUPS.
- Apply credit on deposit: The deposit number offered is the current number as controlled by the software. This number will group this particular activity for processing.
- Reason for adjustment: Define a comment to store with the transaction.
- Perform Adjustment: Click this button to have the software process this task.
- Print Proof Sheet: Click this button to print a report for these adjustments. Refer to GENERAL PRINTING for more information.
- Preview Proof Sheet: Click this button to preview a report for these adjustments. Refer to GENERAL PREVIEW for more information.
- Cancel: Click "Cancel" to cancel and return to the previous screen.
