
Marriage Administration Support Document
Open as: PDF or Word Document
I. Installation
Table of Contents
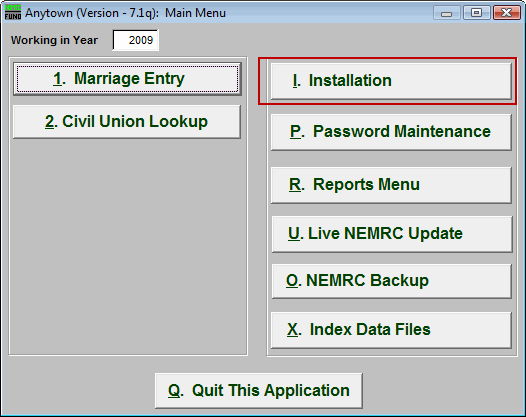
Click on "I. Installation" from the Main Menu and the following window will appear:
Installation
The "General" tab
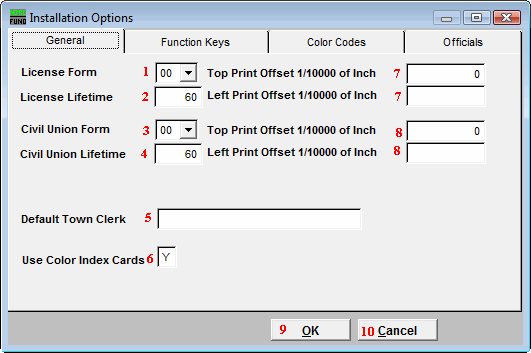
- License Form: Click on the box and select the Form number from the selection provided.
- License Lifetime: Enter the number of days that each license is good for. The default is 60 days. If the ceremony is not held within the number of days entered, then the couple will have to get a new license.
- Civil Union Form: Click on the box and select the Form number from the selection provided.
- Civil Union Lifetime: Enter the number of days that each license is good for. The default is 60 days. If the ceremony is not held within the number of days entered, then the couple will have to get a new license.
- Default Town Clerk: Enter the Town Clerk the form should Default to.
- Use Color Index Cards: Enter in "Y" for Yes if Color Index Cards will be used, or "N" for No if Color Index Cards will not be used.
- Top/Left Print Offset 1/10000 of Inch: A positive number will make the Marriage form print down(Top) OR right(Left) a bit, and a negative number will move the printing up(Top) OR left(Left) a bit. Remember that "1" is equal to "1/10000" of an inch.
- Top/Left Print Offset 1/10000 of Inch: A positive number will make the Civil Union form print down(Top) OR right(Left) a bit, and a negative number will move the printing up(Top) OR left(Left) a bit. Remember that "1" is equal to "1/10000" of an inch.
- OK: Click "OK" to save changes and return to the previous screen.
- Cancel: Click "Cancel" to cancel and return to the previous screen.
The "Function Keys" tab
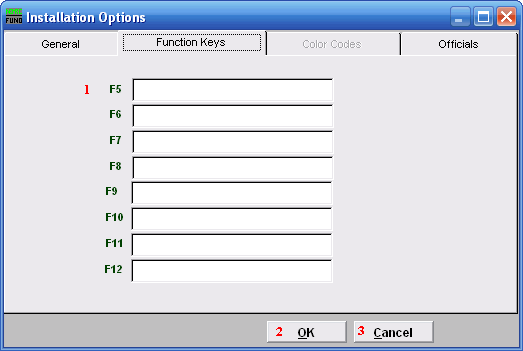
- These are used to set shortcuts for common phrases for easy use, and to save you from having to retype something multiple times.
When a value is assigned from the point of the cursor placement the function key with the assignment can be used to populate fields. Each of these fields are linked to the "Function key" that is to its left. This means that when you hit the "F_" key on the keyboard, the text you entered for that "Function key" will appear. - OK: Click "OK" to save changes and return to the previous screen.
- Cancel: Click "Cancel" to cancel and return to the previous screen.
The "Color Codes" tab
If you enter a "Y" in the "Use Color Index Codes" field in the "General" tab, then the "Color Codes" tab will become available.
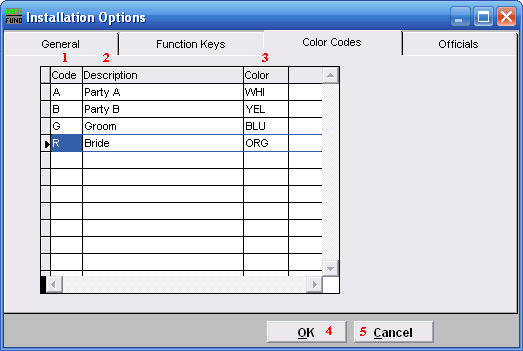
- Code: Enter a letter code of the Description.
- Description: Enter the Description of the code.
- Color: Valid colors are: WHI, YEL, ORG, BLU, PNK, GRE, CRM, PUR.
- OK: Click "OK" to save changes and return to the previous screen.
- Cancel: Click "Cancel" to cancel and return to the previous screen.
The "Officials" tab
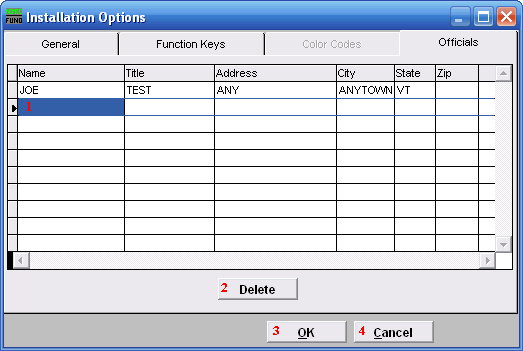
- Selector: Enter the Name, Title, Address, City, State, and Zip code of commonly used Officials.
- Delete: Click "Delete" if you want to Delete an Official.
- OK: Click "OK" to save changes and return to the previous screen.
- Cancel: Click "Cancel" to cancel and return to the previous screen.
