
Voter Checklist Support Document
Open as: PDF or Word Document
I. Installation
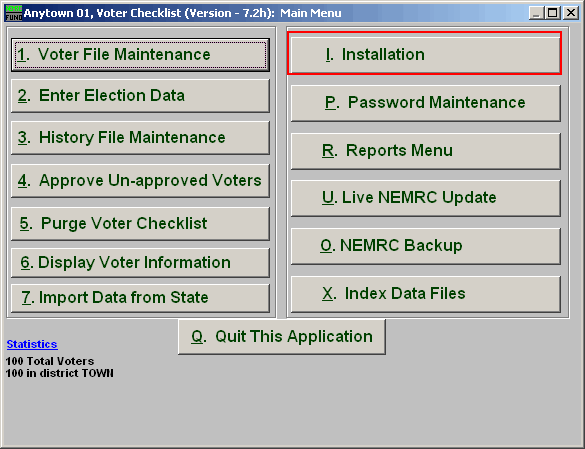
Click on "I. Installation" from the Main Menu and the following window will appear:
Installation
The "General" tab
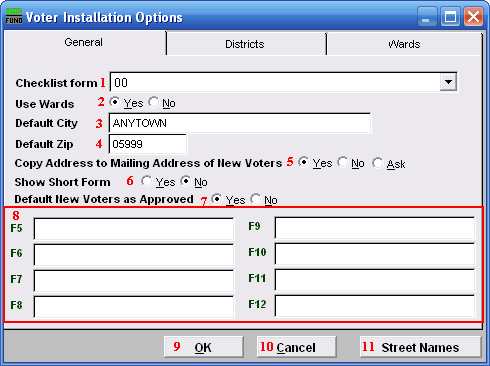
- Checklist form: Click the drop down arrow and select form you use from the Checklist.
- Use Wards: Click to select whether or not to use Wards.
- Default City: Enter the city that will be the default for the "City" field in "1. Voter File Maintenance."
- Default Zip: Enter the Zip code that will be the default for the "Zip" field in "1. Voter File Maintenance."
- Copy Address to Mailing Address of New Voters: Select whether the system automatically uses New Voters' address as their mailing address.
- Show Short Form: Voter File Maintenance can default to normal or short form data input. The screen option is also selectable while on that same screen.
- Default New Voters as Approved: Select whether or not new voters are defaulted to being Approved to vote.
- F_ Keys: These are used to set shortcuts for common phrases for easy use, and to save you from having to retype something multiple times. When a value is assigned from the point of the cursor placement the function key with the assignment can be used to populate fields.
Each of these fields are linked to the "Function key" that is to its left. This means that when you hit the "F_" key on the keyboard, the text you entered for that "Function key" will appear. - OK: Click "OK" to save changes and return to the Main Menu.
- Cancel: Click "Cancel" to cancel and return to the Main Menu.
- Street Names: Click this button to enter default street names. The following window will appear:
Street Names
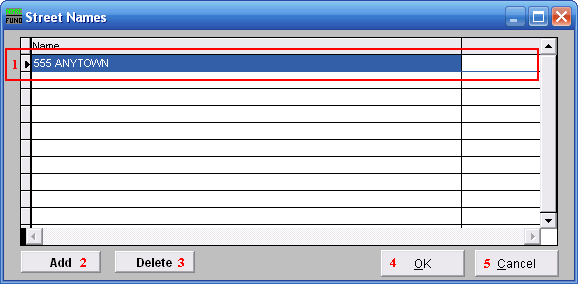
- Selector: Select the street name you wish to edit or delete, then modify it.
- Add: Click "Add" to add a new street name.
- Delete: Click "Delete" to delete the selected street name.
- OK: Click "OK" to save changes and return to the previous screen.
- Cancel: Click "Cancel" to cancel and return to the previous screen.
The "Districts" tab
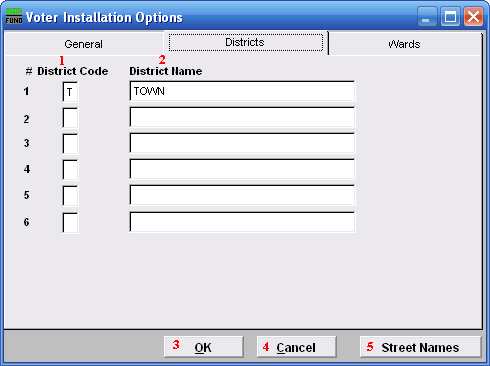
- # District Code: Enter the District Code number to use for the related District Name.
- District Name: Enter the District Name to use for the related District Code.
- OK: Click "OK" to save changes and return to the Main Menu.
- Cancel: Click "Cancel" to cancel and return to the Main Menu.
- Street Names: Click this button to enter default street names. Refer to the "Street Names" section above.
The "Wards" tab
This tab is only available if you chose "Yes" to "Use Wards" in the "General" tab.
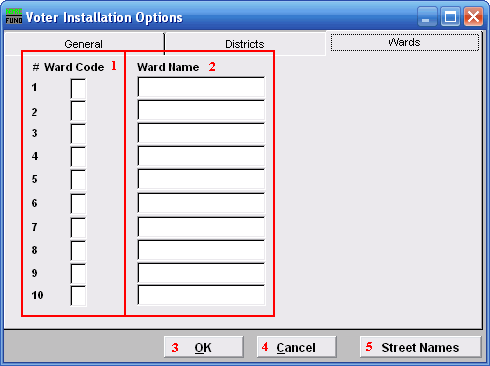
- # Ward Code: Enter the Ward Code number to use for the related Ward Name.
- Ward Name: Enter the Ward Name to use for the related Ward Code.
- OK: Click "OK" to save changes and return to the Main Menu.
- Cancel: Click "Cancel" to cancel and return to the Main Menu.
- Street Names: Click this button to enter default street names. Refer to the "Street Names" section above.
